Friday, December 26, 2014

Christmas Thank You Cards

Well, Christmas 2014 is gone already. Now, to send or not to send a thank you note to those who gave you gifts? ABSOLUTELY YES. Someone took time to go to a store, shop online, and/or make you something. So a thank you card is not only appropriate, but shows kindness and appreciation. And, if you have children, teach them the importance of writing a thank you note. Here is what my 9-year-old and I did.
I made this one - Card 1
We made 5 of this one together. The lights are his finger prints, and he will write the note to thank those who gave him gifts - Card 2 

,
... and I made this one too. Card 3
 Supplies needed
Card 1
Paper: White and red cardstock paper
Tools: Cutting/embossing machine ( I used my Sizzix, which I love), Postcard and hollies embossing folders by The Paper Studios, scalloped oval punch, and oval die
Stamp: Thank you Stampabillities
Ink: Black 
Embellishments: gold ribbon, holly button 

Card 2
Paper: White blank note card
Tools: dark green glitter gel pen, smallest finger of a child's hand
Stamp: Thank you
Ink: blue, gold, purple, blue, and green

Card 3
Paper: White, dark red, and vintage striped cardstock paper
Tools: Sizzix Bigshot cutting/embossing machine, thank you embossing folder (Darice)

You can make your cards simple or more elaborated, but what matters is that you are taking time to make something nice to thank those who blessed you. 

Thank you for stopping by, and my the Christ of CHRISTmas bless you and yours.   
Vanías Reed

Wednesday, December 24, 2014

Merry CHRISTmas

Christmas was love in action because God so LOVED the world that He GAVE His ONLY SON to be born as a little baby on that first Christmas night. You see, without the manger there wouldn't be a cross. Without the cross there wouldn't be an empty tomb. Without the empty tomb there wouldn't be eternal life. My wish is that this Christmas you will have an encounter with Jesus, the Son of God, embrace His love for you, and develop an eternal relationship with Him.
                         
                                          MERRY CHRISTMAS
                                             from Paper Creations, ETC

Friday, December 19, 2014

Stockings Holder + Ornament Idea

I've been posting some Christmas pictures and ideas on my Facebook page. Some of them are decorations ideas for fireplaces. Then it hit me, some people don't have a fireplace, like I didn't for years living in a warm climate. So I made this stocking holder out of an old picture frame that I purchased at Goodwill. Take a look

Supplies needed for this project

Picture frame
Red paint (the spray ones work just fine)
*Small plastic clear ornaments
*Furniture polisher or floor wax
*Glitter
Hooks (you find these anywhere really)
Very small nails (to hold the hooks on the picture frame)
Small hammer
Hot glue gun and hot glue
Push pins
Embellishments: bows, branches... you name it.
Stockings 
Ornaments Idea 
I used the idea found on this blog

* These are to be used if you want to make the ornaments with glitter, if not, you can use small regular ornaments*
 
Using hot glue (be careful, you don't want to melt your ornament), glue the ornaments together to make the letters. Make sure to keep the hangers holes on the same side, which will be the back of the name, except for the top middle one of each letter. You are going to use that one to hang the letters on the picture frame.

Make a beautiful stocking hanger for your family. If you have a fireplace, make one for someone who doesn't. It makes a beautiful and special gift, doesn't it?

Thank you for stopping by, and have a very Merry CHRISTmas! Remember to celebrate the real reason for the season: Jesus Christ. After all, IT IS his birthday we are celebrating, isn't it?

God bless you,
Vanías Reed

Friday, December 5, 2014

Table Decor for Christmas

Last year, just after Christmas, I posted a table decor idea that could be used for New Year's eve or day, or , as I said in my post, you could save the idea for next Christmas. Believe it or not "next" Christmas is almost here already. So here is the same idea for your Christmas table.
You can check that post here to learn how to make the napkin Christmas tree and the star. Another idea is to change the silverware holder for a handmade one, like this
If you crochet, you can find the pattern for the stocking silverware holder in my etsy shop: Crafts Basket , and if you don't crochet, it's ok because you can order the stockings there too.
You can find the name tag on the stocking, which replaces the place card, in this other post.
Thank you for stopping by. Enjoy decorating your table for a nice Christmas eve and/or Christmas Day meal.
May the CHRIST, who is the real reason for CHRISTmas bless you and your family.
Vanías Reed    

Wednesday, December 3, 2014

Odd Shaped Gifts Wrapping

I can't believe Christmas is almost here. Yay! This is definitely my favorite time of the year because one of my pleasures is to give gifts, and watch people's reaction - especially children's- when they open them. Some of the presents though are difficult to wrap because of their odd shape. Like stuffed animals for instance. What to do? Just throw them in a bag? Wrap them in cellophane paper and ruin the surprise? NO! You want to do more than that. So here is a simple and reasonable solution: Round VINYL TABLECLOTH. Really? That cheap thing with flannel inside? Yep. Look at this.

 I had a stuffed reindeer to wrap,
so I opened the tablecloth on my bed,  sat the reindeer in the middle of it,  pulled up all the 'sides', tied it with an 1/8 in ribbon, added a bow, and trimmed the excess from the top. Voila! My reindeer was wrapped in less then 10 minutes, and the package looks cute.
Plastic tablecloths will work too. The paper ones won't because they would be just like wrapping paper. 
Now you have another idea to wrap that cute stuffed animal you bought for a special someone in your life.
Thank you for stopping by. Have a very blessed day.
     Vanías Reed    

Thursday, November 27, 2014

Happy Thanksgiving

I just want to make a pause to thank God for all His blessings upon my family and me, and that includes you. You have taken time to check out my blog and enjoy, pin, and/ or share my creations. Thank you. 

From my family to yours.
Vanías Reed     

Wednesday, November 5, 2014

'Grandma's House' Christmas Card

My son has been practicing the songs for both Christmas programs at church and the school he attends on Fridays - an umbrella for homeschool. In order to know well the songs he will sing, we listen to the CDs in our car wherever we go (I love listening to Christmas songs anyway). Yesterday, as we were listening to, and trying to sing along "Over the river and through the woods, to grandmother's house we go..." I thought of my husband's grandma and how much I miss her. Both my grandmothers passed when I was a child, so this very special lady became my grandma too. Christmas is so beautiful up there where she lives, actually, I don't think there is anything more beautiful than a White Christmas. It was inspired by Christmas at Grandma's that I made this card for a friend. 
Supplies needed for this card
Paper: Dark green, off white and red cardstock paper, hollies paper
Tools: Cutting/embossing machine (I used my Sizzix), decorated edge oval die, (Nestabillities), 1/8"circle punch (to make the corners on the label), permanent adhesive, colored pencils, winter wonderland glitter.
Stamp: Merry Christmas (Stampabilities), White Christmas,
Embellishments: red ribbon, snowflake button. 

Cherish the moments you have with people you love, make sure to tell them you love them, or write it down in card that you made. 

Thank you so much for checking my blog out. Check my etsy store too. 
God bless you and all the people in your life.
 Vanias Reed  

Monday, November 3, 2014

Gift Bag + Free Crochet Ornament Pattern

Wow! I haven't posted anything for a while. I'm sorry. My family and I just moved, and it's amazing how the whole process takes a long time. You pack, you find things that you didn't even remember you had, you move, you unpack, and you find more things you didn't even remember you had. LOL. Anyway, now we are in our new home, and I love it. Now I'm inspired again, and just in time for Christmas. So here this is my first post for our countdown with a free crochet pattern just for you.

Supplies needed
Paper: paper bag
Embellishments: border sticker, crochet snowflake, snowman button

Pattern for the Snowflake
Abbreviations
ch = chain
ch-3 sp = chain-3 space, the space formed when you worked 3 chain stitches in the previous round                                          
dc = double crochet
sc = single crochet  
beg = beginning

Make a magic ring
sl st = slip stitch
Round 1: Work 12 sc sts in ring. Join the work to the beg of the round with a sl st.
Round 2: Work 2 sc into each sc all the way around. You'll end up with a total of 24 sc sts. Sl st to join the work to the 1st sc worked in the round.
Round 3: [sl st in next sc, 1 sc in ea of next 2 sc, sl st in next sc] Work sequence in brackets 5 more times. You'll end up with a total of 12 sc sts in the round. Join with a sl st to first st in the round.
Round 4: [sl st in next sl st, sl st in next sc, ch 3, 2 dc in next sc, ch 3, sl st in next sl st.] Work sequence in brackets 5 more times for a total of 6.
Round 5: [skip all sl sts. Work 3 sc sts into the space formed underneath of the ch-3 in the previous round. ch 3, dc in next dc, ch 3, sl st in 3rd ch from hook, dc in next dc, ch 3, 3 sc in next ch-3 sp.] Repeat sequence in brackets 5 more times, for a total of 6 times. At end of round, sl st to join the work to the 1st sc st worked at the beg of the round.

The snowflake can be used as an ornament. Just ch 8, sl st both beg and end of ch to the back of the snowflake.

This Christmas make something different to embellish your gift bags. 
Thank you for stopping by, and let's countdown to Christmas together.
Vanias Reed

Thursday, September 18, 2014

Cute Turkey Thanksgiving Card

Another fall is coming, and I can't wait! I'm so ready for a cooler weather, aren't you? I mean, if you live anywhere in the south, of course. I know that my relatives and friends up in Michigan and Colorado are wishing it was spring coming instead of fall. (smile). Anyway, whether one prefers a cooler or a warmer climate, I'm pretty sure most of us enjoy to celebrate Thanksgiving with our families and friends. It is such an special holiday. To make it even more special, make a card to go with the dish you will bring, if invited to a dinner. If you are the host/hostess, a card will make your guests feel even more special. So here is an idea for you.
Supplies and technique used
Paper: rusty red, olive green, brown, yellow, rust, cherry red, orange, white, black, and cream
Tools: Cutting/ embossing machine, large polka-dot embossing folder, owl builder punch, flower punch, wave border punch, gift tag punch, fall-colors ribbon, brown pearls
Stamp: Happy Thanksgiving 
Ink: black

One of the reasons why I love this card is the amount of layers. I had so much fun making it. 

Thank you for stopping by. Celebrate any occasion with family and friends. Give handmade cards and gifts. But most of all, may God be always the center of all your celebrations
Vanias Reed    

Monday, September 15, 2014

A Fall Thank You

Hi there all Paper Creations, ETC fans. I want to thank you for following my blog, and tell you the good news. For commercial purposes I had to change my Etsy.com store's name. So I present you Crafts Basket . The blog and the Facebook page will keep the same name that you have liked and followed, Paper Creations, ETC that is - at least for now. So check out my store and find there the crafts you have enjoyed here and more. Here is one of the cards I'm selling there.

Supplies and techniques used
Paper: Rust red, mustard, vanilla, white, dark brown, brown, baby blue,   black, orange, forest green, and yellow cardstock
Tools: cutting/embossing machine, frame embossing folder, owl builder punch, scallop oval punch, oval punch, precision scissors, computer, and printer.
Embellishments: Pilgrim and Indian owls, sentiment phrase
Note: I handmade the Pilgrim's hat and collar, and the Indian's bandana and feathers.

Thank you so much for stopping by. May the Almighty God bless your day.
Vanias Reed  

Friday, September 12, 2014

Fall Button Wreath Card

I don't know if it is because earthly colors are my favorite, but just seeing fall decorations in the stores makes me smile. Living in a warm climate, I don't get to see the trees' leaves changing color, so I enjoy what the stores do, decorate my home, make cards and other fall projects. Here is another one of my autumn cards. Enjoy.
 Supplies and techniques used
Paper: rust red, grey, white cardstock
Tools: cutting/embossing machine, lace border embossing folder
Stamps: 'Happy Thanksgiving' sentiment phrase, olive leaves circle (I stamped this three times to get the thickness I wanted)
Ink: light and olive green
Embellishments: 1 yellow button (bigger than the others), olive green, rust red and orange buttons in different sizes, red yearn bow (passed through yellow button holes first)
No time for crafts? That's ok. You can find this and other cards in my Etsy store 

Thank you for checking out my paper creations. May God's abundant grace and mercy inspire you to create something beautiful.
Vanias Reed    

Thursday, September 11, 2014

Pumpkin Thanksgiving Card

Fall is almost here, and I'm loving it. When you live in a place where summer is extremely hot, the words fall and winter sound wonderful. Just the thought of a cooler weather inspired me to start making my Thanksgiving and Christmas cards. So here is the first one.
Supplies used
Paper: rust red, white, olive green, rust yellow, and brown cardstock
Tools: cutting/embossing machine, wave edge punch, scalloped oval punch, oval punch, 1 3/4 circle punch (to make the pumpkin - see my post 'Fall Ideas' from 09/03/2014), quilling tool (see picture below), computer, and printer.

Embellishments: green gemstones, pumpkin, paper ribbon.
Note: If you don't have a quilling tool, it's ok. You can use small cylinder to roll the pumpkin leaf.
Not much time for crafts? It is ok. You can find this and other of my cards in my Etsy store

Let's thank God for the blessings of family and friends, and give our family members, and our friends nice Thanksgiving cards. 

Thank you for stopping by. God bless you.
Vanias Reed     

Wednesday, September 3, 2014

Fall Ideas

What can you do with paper rosettes, a large circle punch, and a gift tag punch? A cute pumpkin to decorate your table, a gift... the possibilities are endless. Try this:
Then use a large circle punch to make leaves
Next make a gift tag
Then use your imagination and creativity to create something like this
Supplies needed
Tools: orange, cream and green cardstock, hot glue gun, got glue, large circle punch, gift tag punch, brown stamp ink (for the effect on the tag)

This is the kind of project that your children can help with, and turn it into a family tradition.
Thank you for stopping by. God bless you.
Vanias Reed  

Monday, August 25, 2014

Thank You Note

The other day I just stopped to think about all the things for which I am thankful. Wow! Big, big list. To begin, I'M ALIVE! Isn't it great? Then there is the fact that God sent His only Son to die on the cross, and pay for my sins. I have an awesome husband, and a wonderful son, and the list goes on. How about the freedom we have in this country? This beautiful, blessed country called United States of America. So I decided not to send cards to our troops overseas, who fight for the freedom we have, only at Christmas time. I decided to show them how much my family and I appreciate what they do by sending thank you notes now. Here is one of the cards I made to send overseas. 

 Supplies used
Paper: white, red and blue cardstock, glitter white cardstock
Tools: cutting/embossing machine, lace oval punch, oval punch, star punch, stars embossing folder
Stamp: thank you
Ink: black

I hope you get inspired and decide to show appreciation to someone today. If you have kids, get them involved in this "thankfulness wave" (that's what I call it), and make a thank you card for a soldier today.

Thank you for stopping by. God bless you and yours.
Vanias Reed

Saturday, August 2, 2014

Tip on Punches

Hi there. The other day I wanted to use one of my punches to make a card, and it was "sticking" to the paper, and therefore not cutting very well. So I had to find out how to "save" it. Here are two tips that I found to be very helpful for "sticking" punches, or punches that got dull.

How to lubricate your punch

Lubricate your punch by simply punching a piece of wax paper. If the punch doesn't cut a perfect picture, it is ok. The wax from the paper is lubricating it. Repeat the process as many times as necessary until your  punch is no longer sticking when punching paper. If THAT doesn't work, try to spray a little bit of WD40. Be sure to punch scrap paper to clean the excess before using on a good paper.

Sharpening a punch: 

To sharpen your punch, punch a couple of times through aluminum foil or soda can.

Thank you for stopping by. 

May the Almighty God bless you and yours.

Vanias Reed 

Thursday, July 31, 2014

Bridal Shower Ideas

Today I posted a sequence of table decor, party favors and gift ideas on my Facebook page. To see the whole thing please click here.

Thank you for visiting my blog and checking out the Facebook page.
God bless you,
Vanias Reed   

Tuesday, July 29, 2014

Easy, Delicious Cookies

What do you feel like eating on a rainy winter day? Cookies? I like to have a good cup of tea with these "melt in your mouth" cookies. But these cookies, which recipe I'm posting today, are good in the summer too because you can make ice-cream sandwiches with them, and they are SO EASY to make. So whether you are going to wait for winter or you're going to make them right away,  while the children are on school break, here is the recipe for you. 

 2 1/2 cups (20 oz) corn starch
1 can sweet condensed milk
3/4 cup (6 oz) butter or margarine at room temperature

Heat the oven to 350 F
In a medium bow mix the ingredients until smooth (a little sticky) dough forms.
Using a cookie scoop or a teaspoon, place small balls on a cookie sheet (I cover mine with parchment paper first) at about 1 in apart. Bake for 10 - 13 minutes.

Variations
1st. Add 1/2 cup shredded coconut, if you like coconut cookies.
2nd. Add 1 tsp mint or peppermint extract to the mix 

Serve them with tea to your guests. Don't forget to decorate your cups with the little paper butterfly (July 7th post)


 I hope you like these as much as I do.
Thank you for stopping by. May God bless you and yours.
Vanias Reed   

Tuesday, July 15, 2014

A Christmas Tip: Two Ideas Wrapped in One

Brown bag as gift wrapping. What a simple, but creative idea! Decorate it and use it for a "Christmas Favorite Thing Party". What is a Favorite Thing Party? I'm glad you asked. Each guest brings their favorite item (5 of the same thing) costing no more than $10.00, and a favorite treat or dish to share with everyone! Great idea for us who are tired of White Elephant and Secret Santa. 

I found some of the ideas above in websites and added my own touch. 
Thank you for stopping by. God bless you. 
Vanias Reed    

Saturday, July 12, 2014

A CHRISTmas Preview - Free Crochet Pattern

It's Christmas in July! Even though it is hot and humid here, I'm starting to get ready for Christmas. It is never too early, is it? So here is a small preview of the things on which I have been working. It is a card with a cute crochet peppermint ornament. Enjoy!

Supplements used
Paper: Red and glitter white cardstock, candy cane scrapbook paper.
Tools: Crochet hook, precision scissors, computer and printer, white and red yarn, foam mounting, red and white twine, glitter glue
Embellishments: Letters and crochet peppermint. 
Find the pattern for the crochet peppermint here

Don't use permanent glue to attach the ornament to the card, so the person to whom you are giving the card will be able to hang the ornament on their tree.
Thank you for stopping by. Merry Christmas in July!
Vanias Reed    
 

Monday, July 7, 2014

Butterfly for Tea Bags

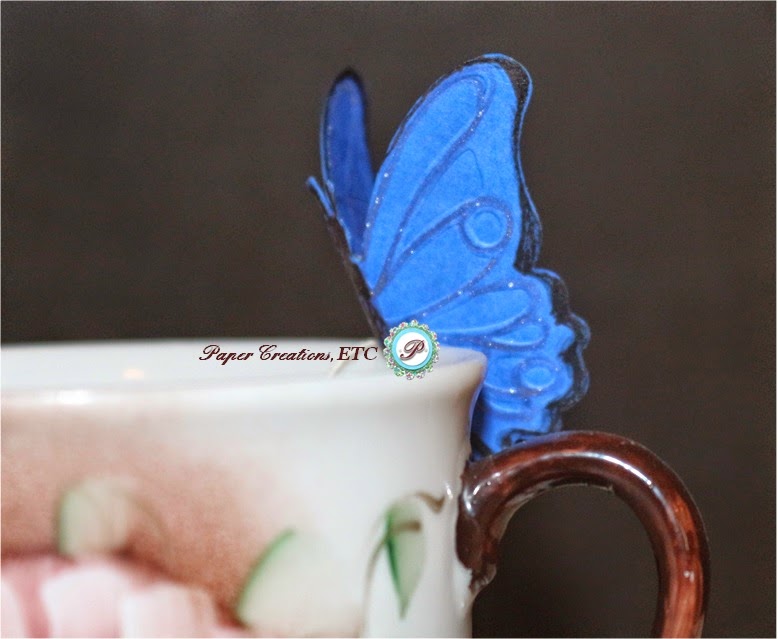
I saw this idea online and fell in love with it, so I decided to put my head and hands to work and figure out how to make it. Here it is, or I should say, here they are because I made more than one. 

It's a little butterfly attached to the string of the tea bag. Isn't it cute? You can find them in my Etsy store

Supplies Needed
Paper: cardstock
Tools: cutting/embossing machine, butterfly die, precision scissors, hole punch, glue and coloring pens.
They are delicate and add a touch of decor to your cup.
 You can give them as a gift (they come in sets of 8 unless custom ordered differently), use for different occasions or just for some tea with friends.


Thank you for visiting my blog. Enjoy a good cup of tea, relax and craft for fun. May God bless you and yours.
Vanias Reed    

Sunday, June 29, 2014

Independence Day

I cannot believe half of 2014 is gone already. Wow! Next week we'll celebrate the 4th of July once more. So I gathered some interesting ideas from all over the internet + some of my own to turn them into suggestions your your celebration. Enjoy.
 1st suggestion: breakfast - toast with cream-cheese, red jam, banana slices and blueberries.


2nd suggestion: healthy choices for food like fruit, cheese and yogurt.


 3rd suggestion: table decor including ideas for napkins
 
4th suggestion: fruit juices. The star cookie cutter is an excellent option to make the stars.
5th suggestion: not so healthy food - I loved the 'smores bar' idea. What a great way to make your guests feel free to make their own smores, save time and add fun to your celebration. Cupcakes and fruit pies are always a good idea too.
The most important thing to remember is the reason why we celebrate the 4th of July. We live in a wonderful country. We have FREEDOM of speech and religion here -whether some people like it or not. America is a wonderful country because our forefathers firmly believed that men could not govern over the people without faith in God. Let's celebrate the Independence Day with family and friends re-dedicating this country to the Almighty Creator.

HAPPY 4TH OF JULY
Vanias Reed   

Monday, May 26, 2014

Fathers Day

I cannot believe it's almost June, and Fathers Day is just around the corner. Amazing how time has flown by. Fathers day is a bittersweet day for me. I enjoy celebrating it because of my husband and the wonderful relationship he has with our son, but I miss my Dad a lot too. The good news is that one day I will see him again. Not because I deserve it or because I'm a good person. But because my Heavenly Father sent His only Son to die on the cross for me. Jesus paid the debt that I could never pay. You see, sin created this huge gap between God, who is holy and perfect, and us - sinners and therefore imperfect. Jesus is the bridge that covers that gap, and ONLY THROUGH HIM we can reach God again. When I was 13, I accepted this amazing gift God offered me - a relationship with him through Jesus. On that day I was adopted by Him, and He became my heavenly Father. Now I can have the certainty of seeing my Dad again because he made that decision too. We both have Jesus as our Lord and Savior. We both are going to be in our heavenly Father's presence one day, and we are going to enjoy each other again too. Meanwhile, I'll keep celebrating Fathers Day with my husband, and making cards for him like this one.
Supplies used
Paper: Brown, olive green, off white and black cardstock
Tools: round corner punch, computer, printer, precision scissors
Stamps: 'Moments in Time', and background text (Stampabilities)
Ink: Black
Embellishments: Medium and small brown pearls, pocket watch, light brown twine, man and boy silhouette (I found this online, printed it and pasted it on black cardstock), sticker letters.

I hope you can celebrate Fathers Day with your Dad, but most of all, I hope God has become your heavenly Father. If not, you can always go to him, ask him to forgive you for your wrong choices, accept that Jesus is His Son and only way to get to Him, and ask Him to be your Savior. If you have any questions, you can email me, or leave me a message on my Facebook page (same name as this blog). 

Happy Fathers Day. Many blessings unto you.
Vanias Reed