Saturday, January 26, 2013

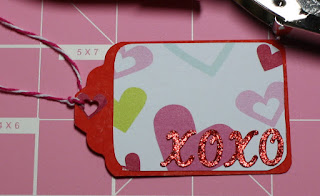
Valentine's Day Gift Tags

 If you can make cards for the special people in your life,  you should be able to make some gift tags as well. You'll need some tools. But if you don't have them, it is ok. Stickers work too. If you are just beginning, it is always a good idea to start small and simple.


  You can use a punch to make your tags,

or buy blank tags at your favorite craft store.
I go either way. It depends on what shape and size  I need.
 

  A small heart shape punch helps too.


Or a double hole  punch that will allow you pass a ribbon through  for the effect above.  


 Stamps can always be used. I used colored pencils to color my little bear.


The important thing is to use your creativity, imagination and a good dose of love for the person you are giving the gift.

Vanias Reed           

Friday, January 25, 2013

Envelopes


We are learning how to make beautiful cards, but how about the envelopes?  
Let's personalize them too? Here are some suggestions:


 How about recycling? Did you know you can make your own envelope even out of grocery paper bags? That's right. Take a look.

Open the grocery bag in the middle and cut the bottom off.

 Use an old envelope as a pattern
 Iron the paper

 Fold it and paste the sides
Now look at what you can do when writing the address on the front of the envelope


There you go, a handmade envelope with a personal touch.

Vanias Reed      

Thursday, January 24, 2013

Valentine's Day


What do you give for Valentine's Day? Chocolate? How about doing something a little different from the traditional? Still chocolate, but homemade. Actually an easy and delicious microwave fudge. 

You will need:  3 cups semisweet chocolate chips
                                1 can sweetened condensed milk
                                1 tsp vanilla

Line 8x8 inch (20cm  x 20cm) pan with wax paper and set aside.
In large microwave-safe bowl combine chocolate chips and sweetened condensed milk. Microwave on high for 2 minutes. Stir in vanilla.  Pour fudge mixture into pan. Refrigerate until firm. Do not keep in the refrigerator for too long.

Here is what your fudge should look like.

 Variations:
For sweeter fudge use 2 cups semisweet chocolate chips and 1 cup milk chocolate chips.
For chocolate walnut fudge add 1/2 cup chopped walnuts after vanilla.
For peppermint fudge add 1/2 tsp peppermint flavoring (not oil) after vanilla. Press 6 crushed peppermint candy on top of fudge before refrigerating.
For peanut butter fudge use 4 cups peanut butter chips
 
Cut the fudge in squares and wrap them individually in tin foil


 Place them in a box with some shredded red paper in the bottom (basket filling), or use shredded newspapers for a more vintage look.

Wrap the box. I used this beautiful red fabric.

  
You can also use red tissue paper and clear decorated cellophane as shown below.

Make a beautiful bow and a tag. I used a silver bow because the pieces of fudge were wrapped in silver foil. ( I'll post soon the directions for tags)


Here is your Valentine's Day gift for that someone special, and it is entirely homemade.


Vanias Reed           


Tuesday, January 22, 2013

Butterfly

One of the managers of a restaurant we enjoy very much is sick. She is a very sweet young lady and  today I decided to make a card for her and share it with you.
To make this card I used my embossing machine and an embossing folder by Darice.

We are making a 4" x 6" (10cm x 15cm) card, so you need to cut your cardstock paper double this size. I used a light pink.

 Fold your cardstock paper in half  and then paste the embossed white paper, which should measure 3"x 5" (7.5cm x 12.5cm), on it


Paste the sentiment on the die cut and, using 3D glue dots, paste the die cut to the embossed paper. Your die cut should be the same color as the card. And if you don't have a stamp with the sentiment phrase you want, you can always print it from your computer.


Add some pearls to the body of the embossed butterflies. White ones will look good too.

 
Don't forget to add a detail inside. 


The brush was used to clean the excess glitter.

And there you go. You made another card for someone special. This one will go to Amber.

By Vanias Reed


Monday, January 21, 2013

Tip of the day

Add a personal touch to a white paper bag and make it a beautiful, one of a kind, gift bag.

This one was made in the fall, therefore I used fall leaves, an orange bow, and some wheat. You can use flowers in the spring, or die cut snowflakes in the winter. Use your creativity and make that unique gift bag that will stand out in any party.
Vanias Reed


Wedding or Anniversary

How about a handmade card to give to that sweet couple getting married or celebrating their anniversary?


 This card is different in size from the other ones we have made. This a 5"x7"
 The material used was silver, black and white paper.
1. Cut the silver paper 4"x6"
2. Cut the black paper 0.2" smaller than the silver on each side.
3. Cut the white paper 0.2" smaller than the black on each side too.
4. I used Paper Studio embossing folder to emboss the white paper and stamps for the "Congratulations" and bells.
5. I used black (first) and silver ink for the bells.

Here is how I made the corners of the silver, black and white paper pasted on the card.
1" circle punch to cut the corners of the paper

Here is how it looks after cutting the corner out.
8. Paste the paper on the card - first the silver, then the black and finally the embossed white one. Stamp the last one.


9. Add a detail inside (we always do, don't we?)


Great job!!! Now you have a handmade card for that special couple.


  Don't forget to put your signature on the back of the card!

By Vanias Reed.