A couple of months ago we learned how to make a box. Today we are going to make a gift bag.
 |
| Handle and bow made with the same ribbon |
Gift Bag Tutorial
Take a 12” x 12” sheet of paper
and cut to 9” x 12”
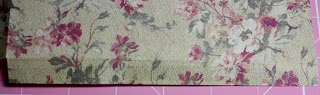
Score at 5” and 7”
Turn the paper and score the
bottom at 2”
Crease the lines to fold, and cut
on the other lines as shown on template
Cut the 3” x 12” strip to 3” x 9”.
Score at ½” and 2 ½”
Turn the paper and score the
bottom at 2”
Trim away the outer ½” pieces
Use runner adhesive to adhere the
side panel (3”x 9” strip) to the main piece, one side at a time.
Fold the flaps at the base and
paste them. Score top flap at ¼” and 1” and fold over the bag
Punch holes through the top of the bag, including the flap.
Put eyelets to make the handle
support stronger and for a better finishing.
Decorate your bag as you please.
 |
| Gift bag attempt to template |
 side strip
 |
| Adhesive on side strip |
 |
| The side will look like this |
 |
| Top flap |
 |
| Eyelets |
 |
| Handles, lace and a pin to decorate. |
Now you know how to make a box and a bag. To make a bigger bag just use a bigger piece of paper and change the measurement proportionally.
Happy gift giving!
Vanias Reed


